So - DNS. That ol' thing. Without it, the internet would just not function for many - having to remember all those numbers.
In this day and age, it's a bit silly to self-host your DNS zones when some great cloud provider options exist - but, how do we keep it redundant and ensure a cloud failure doesn't take our awesome websites offline? And how do we do that for free? (Don't check the records for this blog pls, it's purposely just on Cloudflare :-))
We will use 4 tools - so let us get started! Go ahead and create an account with the following services if you haven't already.
- Digital Ocean - they provide a free DNS hosting service with an API. Sign up here for $100, 60-day credit
- Cloudflare - they also provide a free DNS hosting service
- GitHub - We will be using GitHub Actions and codifying our DNS with a tool called octoDNS
Let us assume you have a domain to use for this already. I'll use
npratley.net, and we are going to migrate as I don't want to break my
emails :) Go ahead and register a domain if you don't have one already!
Getting Setup
Head to the Digital Ocean Console, and add your domain name under "Network > Domains".
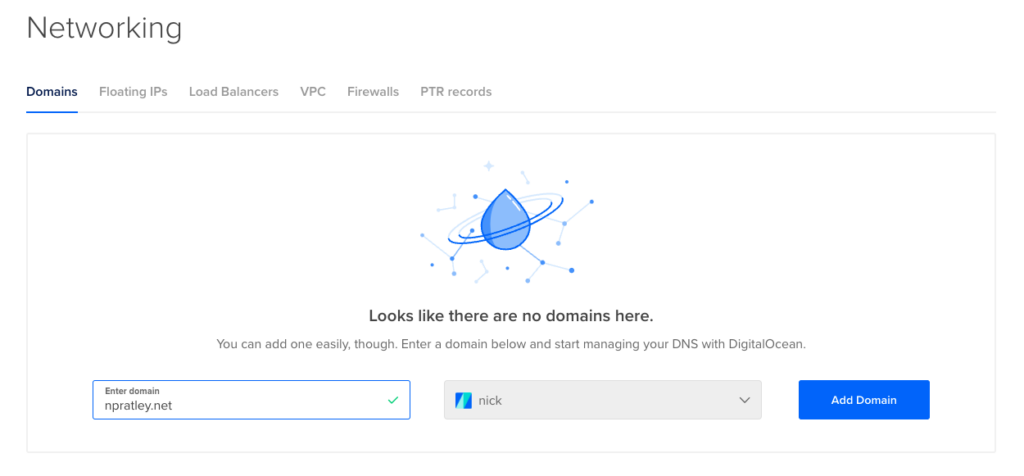
Adding a domain in Digital Ocean
Don't worry about creating any records at the moment, we will control this all with
octoDNS later.
We just need to create an API token now - do that from the "API > Personal Access Tokens" Menu.
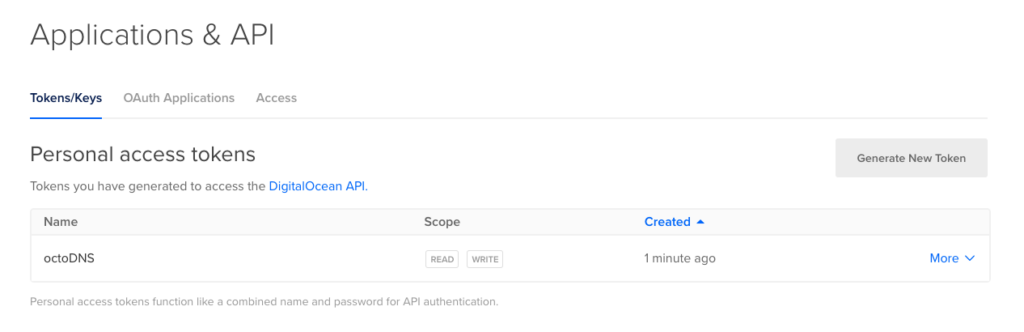
API Tokens in Digital Ocean
The domain is already set up in Cloudflare, so I will skip that step for now.
Migrating Cloudflare to octoDNS yaml zones
octoDNS uses YAML files to describe DNS records and keep them codified in git. Instead of re-creating the files by hand, we can pull the zones from Cloudflare (or any other provider). Ensure you have python and venv installed, then let us move on.
$ mkdir -p dns/zones && cd dns
$ python3 -m venv venv
$ source venv/bin/activate
$ pip3 install octodns
With
octoDNS installed and a workspace created, we can now create the
required config files. Create a .env file with the following contents.
For Cloudflare, you must use your Global API Token.
CLOUDFLARE_EMAIL="ENTER EMAIL"
CLOUDFLARE_TOKEN="ENTER TOKEN"
DIGITALOCEAN_TOKEN="ENTER TOKEN"
Now create config.yaml with the following contents
---
manager:
  max_workers: 10

providers:
  zones:
    class: octodns.provider.yaml.YamlProvider
    directory: ./zones
    default_ttl: 300
    enforce_order: true

  cloudflare:
    class: octodns.provider.cloudflare.CloudflareProvider
    email: 'env/CLOUDFLARE_EMAIL'
    token: 'env/CLOUDFLARE_TOKEN'

  digitalocean:
    class: octodns.provider.digitalocean.DigitalOceanProvider
    token: 'env/DIGITALOCEAN_TOKEN'

zones:
  npratley.net.:
    sources:
      - zones
    targets:
      - cloudflare
      - digitalocean
This config file tells octoDNS that we want to use the local YAML files
stored in the ./zones/ directory and sync them to both Cloudflare and
Digital Ocean.
octoDNS includes a tool to dump zones from a provider into local files now, so we will run that.
$ source .env
$ octodns-dump --config-file config.yaml --output-dir=zones/ npratley.net. cloudflare
It has taken the 4 records from Cloudflare and created the local zone
file, ./zones/npratley.net.yaml. Sweet! It should look something like
the one below
---
? ''
: - type: MX
    value:
      exchange: npratley-net.mail.protection.outlook.com.
      preference: 0
  - type: TXT
    values:
    - MS=ms40294280
    - v=spf1 include:_spf.google.com include:spf.protection.outlook.com ~all
autodiscover:
  octodns:
    cloudflare:
      proxied: false
  type: CNAME
  value: autodiscover.outlook.com.
www:
  octodns:
    cloudflare:
      proxied: true
  ttl: 300
  type: CNAME
  value: hosting.devlan.io.
Syncing octoDNS to both Cloudflare and Digital Ocean
Now that we have our local DNS zonefiles it's super simple to sync the records. by default, octoDNS will dry-run everything and no changes will actually be made, so let us go ahead and see what happens!
$ source .env
$ octodns-sync --config-file=./config.yaml
If everything is set up correctly, octoDNS should issue you a report with everything that it will do! We can see that it is going to change the TTL on my TXT and MX records (due to the default 5 minute TTL in the configs), and it's also going to create all the records in Digital Ocean.
********************************************************************************
* npratley.net.
********************************************************************************
* cloudflare (CloudflareProvider)
*   Update
*     <MxRecord MX 3600, npratley.net., [''0 npratley-net.mail.protection.outlook.com.'']> ->
*     <MxRecord MX 300, npratley.net., [''0 npratley-net.mail.protection.outlook.com.'']> (zones)
*   Update
*     <TxtRecord TXT 3600, npratley.net., ['MS=ms40294280', 'v=spf1 include:_spf.google.com include:spf.protection.outlook.com ~all']> ->
*     <TxtRecord TXT 300, npratley.net., ['MS=ms40294280', 'v=spf1 include:_spf.google.com include:spf.protection.outlook.com ~all']> (zones)
*   Update
*     <CnameRecord CNAME 3600, autodiscover.npratley.net., autodiscover.outlook.com.> ->
*     <CnameRecord CNAME 300, autodiscover.npratley.net., autodiscover.outlook.com.> (zones)
*   Summary: Creates=0, Updates=3, Deletes=0, Existing Records=4
* digitalocean (DigitalOceanProvider)
*   Create <MxRecord MX 300, npratley.net., [''0 npratley-net.mail.protection.outlook.com.'']> (zones)
*   Create <TxtRecord TXT 300, npratley.net., ['MS=ms40294280', 'v=spf1 include:_spf.google.com include:spf.protection.outlook.com ~all']> (zones)
*   Create <CnameRecord CNAME 300, autodiscover.npratley.net., autodiscover.outlook.com.> (zones)
*   Create <CnameRecord CNAME 300, www.npratley.net., hosting.npratley.net.> (zones)
*   Summary: Creates=4, Updates=0, Deletes=0, Existing Records=1
********************************************************************************
If we are happy with the above results, we can go ahead and run the sync
now. it's the same command as above, with --doit added.
$ octodns-sync --config-file=./config.yaml --doit
...
2021-12-01T09:21:04  [4347772224] INFO  CloudflareProvider[cloudflare] apply: making 3 changes to npratley.net.
2021-12-01T09:21:06  [4347772224] INFO  DigitalOceanProvider[digitalocean] apply: making 4 changes to npratley.net.
2021-12-01T09:21:08  [4347772224] INFO  Manager sync:   7 total changes
In some cases, there might be too many records changing. octoDNS has
built-in protection to make sure you can't delete your entire zone, or
add too many records in a single go unless you explicitly tell it you
know what you are doing. In this case, add the --force option.
If we run the command again, no changes should be made as both providers are now in sync. Fantastic - we can move on to the GitHub Actions setup.
GitHub Actions Setup
If you've made it this far, woo! I think it's time for some automation now. On every push to GitHub I want octoDNS to test and sync my config, so let us jump right in.
Create a new repo in GitHub. Can be private or public, I am just going to leave this public - because why not, there isn't anything secret here!
Back in our work folder, let us initialise a git repo, add the upstream repo and push our first commit.
$ echo "./env" > .gitignore
$ echo "venv" >> .gitignore
$ git init
$ git add .
$ git commit -m 'Initial zone commit'
$ git remote add origin git@github.com:nicko170/dns.git
$ git push origin master
Now that our git repo is set up we can go initialise all the repository
secrets in GitHub. Head to your GitHub repo and create a secret for each
item in your .env file. Mine looks like this
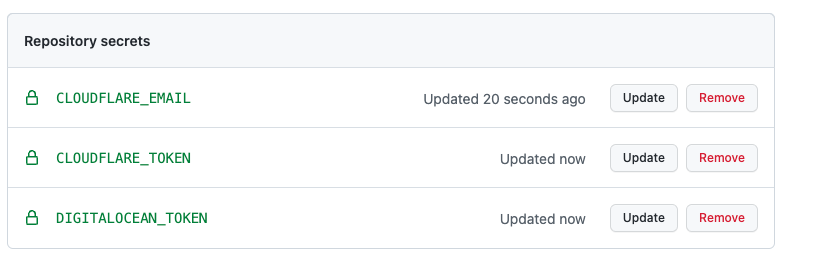
Repository Secres from GitHub
Let us create the GitHub Actions workflow now - this will do a few things, basically, install python, install the local packages we require, and then sync our DNS records.
$ mkdir -p .github/workflows/
$ pip3 freeze > requirements.txt
Grab the below file and save it as ./github/workflows/deploy.yaml
on:
  push:
    branches:
      - master

jobs:
  deploy:
    name: octoDNS Deploy
    runs-on: ubuntu-latest
    steps:
      - uses: actions/checkout@master

      - uses: actions/setup-python@master
        with:
          python-version: '3.9'

      - uses: py-actions/py-dependency-install@v2

      - run: octodns-sync --config-file=./config.yaml --doit
        env:
          CLOUDFLARE_EMAIL: ${{ secrets.CLOUDFLARE_EMAIL }}
          CLOUDFLARE_TOKEN: ${{ secrets.CLOUDFLARE_TOKEN }}
          DIGITALOCEAN_TOKEN: ${{ secrets.DIGITALOCEAN_TOKEN }}
We should have everything in place now, so let us add the new files in and push a commit. This won't change any DNS records now - but just prove that the system is working.
Fantastic, it worked! https://github.com/nicko170/dns/actions/runs/1523290639
Let us add a new record in, push a new commit and check Cloudflare and Digital Ocean to make sure the records exist. See the GitHub logs here, and check the results below!
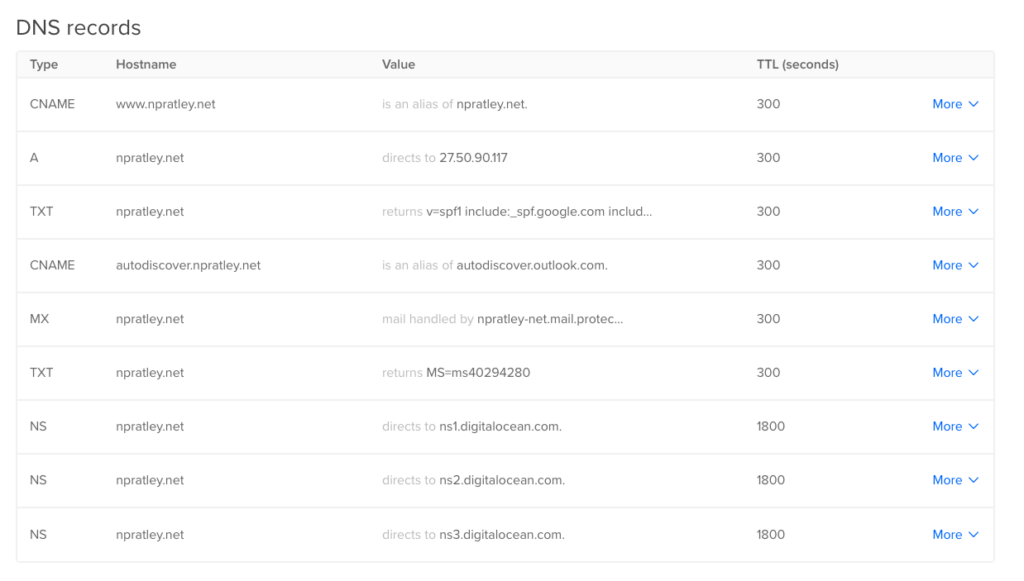
DNZ Zones from Digital Ocean
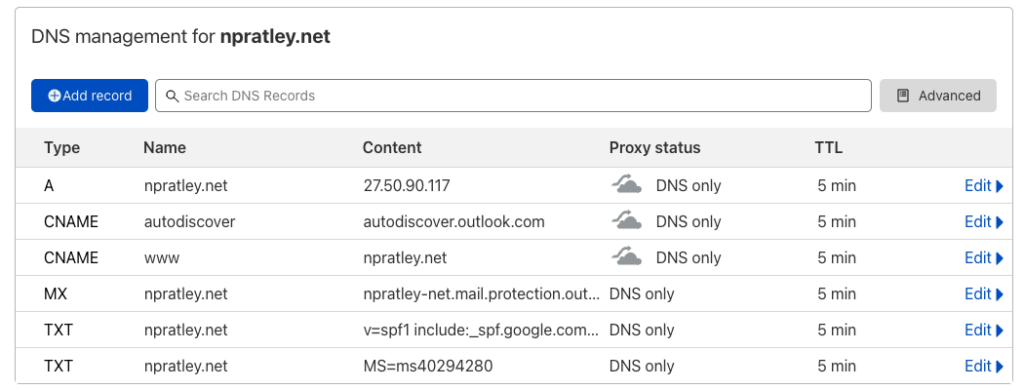
DNZ Zones from Cloudflare
The last step is to add both sets of nameservers into your domain registrar, which will tell everyone they can query either Cloudflare or Digital Ocean when looking up results. If either provider goes away, you will have a completely redundant automated DNS setup at no cost :) I'll leave this as an exercise for the reader.
I hope you enjoyed this!